
Views: 0 Author: Site Editor Publish Time: 2025-11-18 Origin: Site


Ready to dive into the world of sheet metal welding? You might feel a bit nervous about where to begin or how to weld sheet metal without making rookie mistakes. Many beginners face challenges like:
Managing heat to avoid warping the metal
Picking the right material for each project
Learning the right welding techniques
Making precise cuts so everything fits together
Don’t worry! You can master these skills with a bit of guidance and practice. Let’s get you started on the right path to welding success.
Begin with the correct tools. You need a MIG welder, clamps, and cleaning tools for good sheet metal welding.
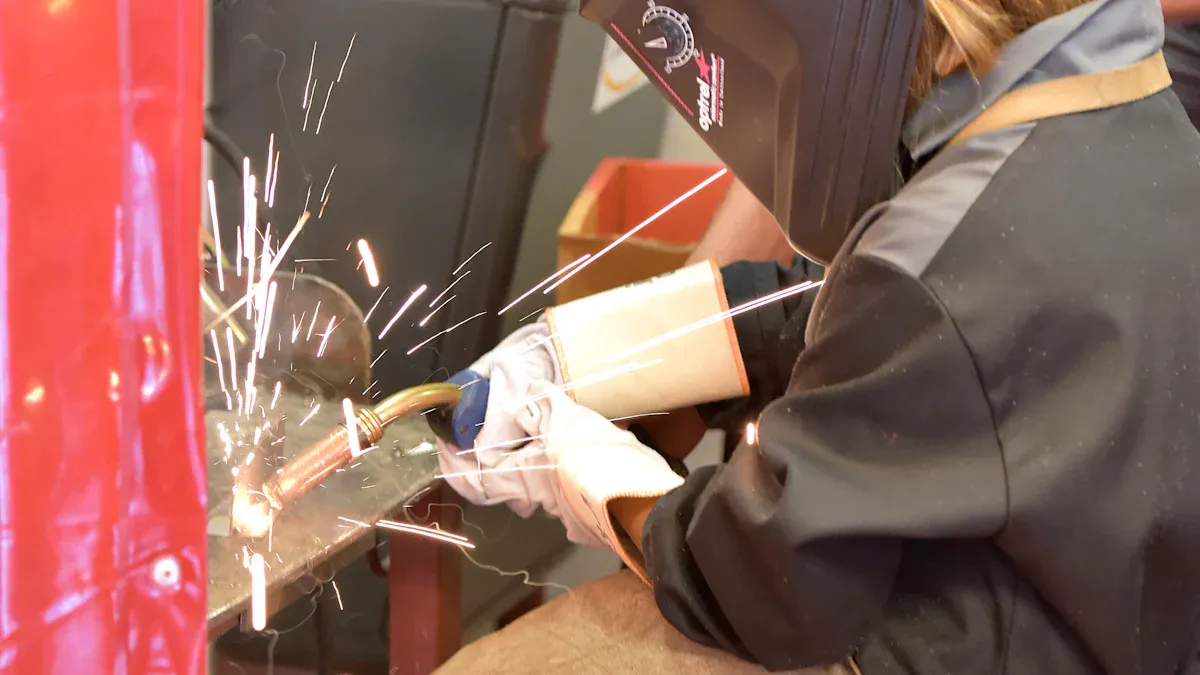
Safety comes first! Always wear safety gear like gloves and a welding mask. This helps stop injuries when you weld.
Pick the best welding method. MIG is good for beginners. TIG is better for thin materials and gives more control.
Get your metal ready the right way. Clean it well to stop weak welds and make strong joints.
Try welding on scrap metal first. This helps you learn and feel sure before you start real projects.
You need the right tools before you start welding sheet metal. Here is a simple checklist to help you get ready:
Welder: A MIG welding machine is easy for beginners. It lets you control your work and is good for thin sheet metal.
Clamps: Use strong clamps to keep metal pieces still. This helps your hands stay free and makes your welds better.
Angle Grinder or Wire Brush: Clean metal is important. These tools take off rust, paint, or oil before you weld sheet metal.
Measuring Tools: Use a tape measure and metal ruler for exact cuts and to line things up.
Welding Table: A flat, strong table keeps you safe and makes welding easier.
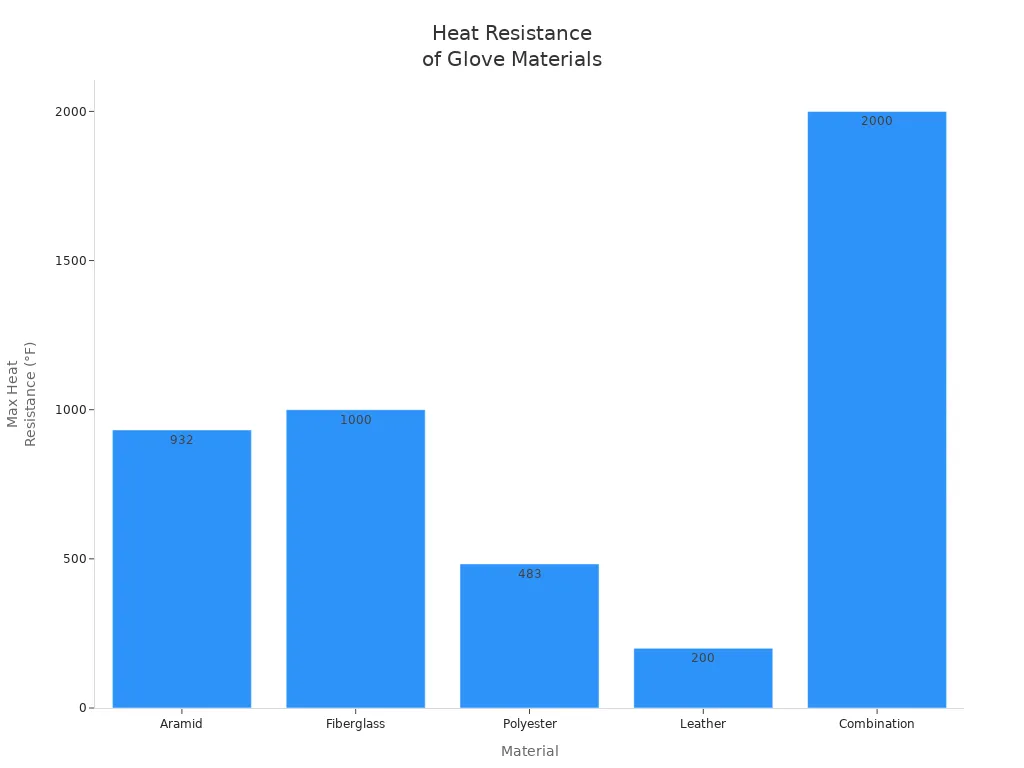
Welding can be risky if you do not protect yourself. Always wear the right safety gear and follow good habits. Here is a quick guide to the best gloves and masks:
Material | Heat Resistance | Additional Notes |
|---|---|---|
Aramid | Up to 932°F | High melting point, used for heat resistance |
Fiberglass | Up to 1000°F | Used mostly as an interior liner |
Polyester | Up to 483°F | Flame-resistant, does not burn easily |
Leather | Up to 200°F | Commonly used, durable, diminishes heat |
Combination | 600°F - 2000°F | Increases heat-resistant performance significantly |
Pro tip: Pick gloves made with more than one material for better safety. Try to get gloves with cut resistance and an ANSI/ISEA cut level A3 or higher.
When you weld sheet metal, always wear a welding mask with the right shade. This keeps your eyes safe from sparks and UV light. Ear protection and a long-sleeve, flame-resistant jacket help stop burns and block loud sounds.
Here are some top safety tips, based on industry rules and what we do at Foshan Dingyi Industrial Technology Co., Ltd.:
Learn about job dangers and safe welding steps.
Read all instructions and safety sheets from the maker.
Keep a fire extinguisher close and never weld near things that can burn.
Wear heat-resistant clothes and take off all jewelry.
Store gas tanks standing up in a dry, airy place.
Make sure your work area has good airflow.
Always ground the things you are welding.
Use the right eye protection and keep first aid supplies nearby.
If you follow these tips, you can weld sheet metal safely and feel sure about your work.
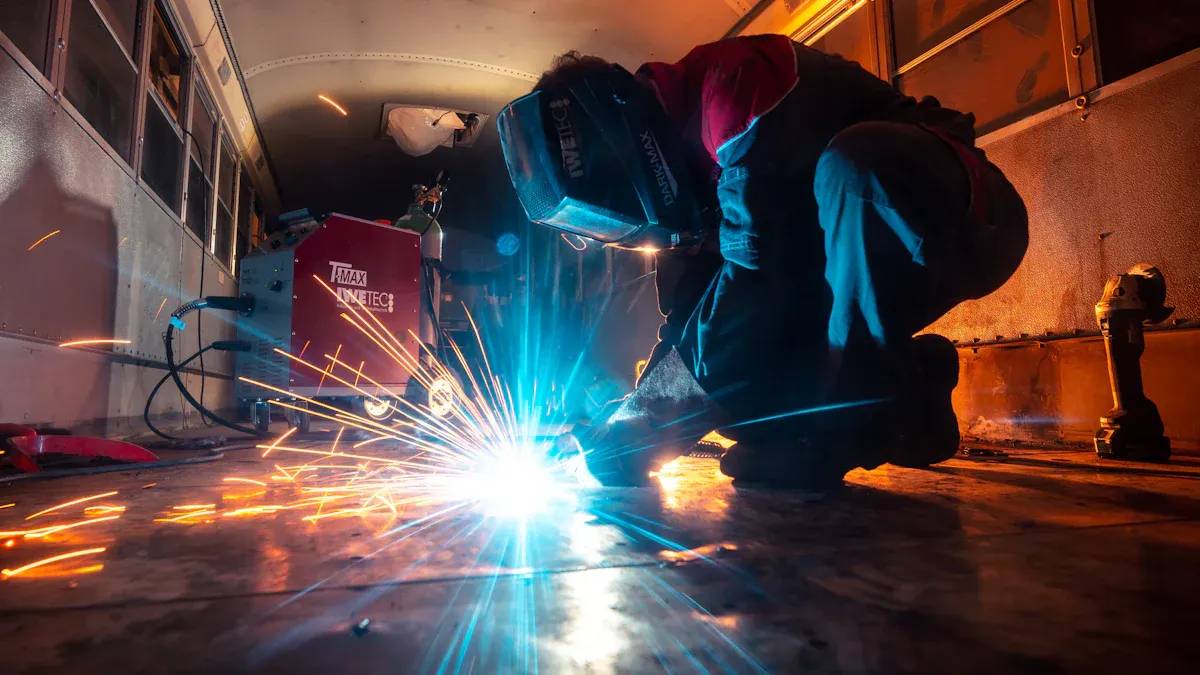
Picking the right welding method can make your sheet metal welding project much easier. You have three main choices: MIG welding, TIG welding, and stick welding. Each one works a bit differently and has its own strengths.
Here’s a quick look at how they compare:
Welding Type | Advantages | Disadvantages |
|---|---|---|
MIG | Faster welding time | Hazards and limitations |
TIG | High precision | Takes more training |
Stick | Simple setup | Harder to control on thin sheet metal |
MIG welding is a favorite for beginners. You can learn it quickly and use it for many types of sheet metal. It works fast and gives you strong welds. If you want to weld thicker pieces, MIG welding is a solid choice. Just remember, it can be tricky on thin sheet metal because too much heat can burn through. We use MIG welding in our shop for many home appliance and industrial automation parts.
TIG welding gives you the most control. You can make neat, smooth welds, which is perfect for thin or delicate metal. TIG welding is slower, but you get cleaner results. If you want to weld thin sheet metal or join different metals, TIG welding is the way to go. Our team at Foshan Dingyi Industrial Technology Co., Ltd. often uses TIG welding and argon arc welding for robot control cabinets and new energy charging station cases. These methods help us create strong, flawless welds.
Here are some tips for welding thin metal with TIG:
Use a foot pedal to control the heat.
Weld downhill to keep the metal from burning through.
Switch to argon gas for better heat control.
Place a backing bar behind the weld to absorb extra heat.
Try stitch welding so the metal can cool between welds.
Stick welding is simple and works well outside or on dirty metal. It is not the best for thin sheet metal because it is hard to control the heat. You might see more spatter and rougher welds. If you need to weld thick or rusty metal, stick welding can help. For most thin projects, though, you will get better results with MIG or TIG.
Choosing the right welding processes helps you get the best results. Try different methods and see what works for your project. If you want to see how professionals handle sheet metal welding, check out our work at Foshan Dingyi Industrial Technology Co., Ltd. We use advanced welding processes to deliver high-quality results for every client.
Getting ready is half the battle in sheet metal welding. If you skip the prep work, you might run into problems like weak welds, holes, or ugly seams. Let’s break down what you need to do before you strike your first arc.
You want your welds to be strong and smooth. That starts with clean metal. Dirt, oil, rust, and even tiny bits of paint can mess up your weld. These things cause weak spots, spatter, and even holes in your finished work. If you’re welding thin sheet metal, even a little contamination can ruin the joint.
Here are the most common troublemakers you’ll find on your metal:
Dirty materials: Grease, oil, and dust can cause the weld to bubble or crack.
Oxide contamination: A thin layer of oxide can stop the weld from sticking right.
You have a few ways to get your metal ready. Check out this table to see which cleaning method fits your project:
Method | Description | Pros | Cons |
|---|---|---|---|
Mechanical Cleaning | Use sandpaper or a wire brush to scrub off dirt and rust. | Cheap, works well for removing heat tint. | Takes time, might scratch the surface. |
Chemical Cleaning | Apply pickling paste to dissolve stains and rust. | Gets rid of rust and stains fast. | Needs strong safety gear, chemicals can harm. |
Electrochemical Cleaning | Use a special brush and fluid to clean and protect the metal. | Quick, safe, also passivates the surface. | Needs special tools, costs more at first. |
Tip: Always wear gloves and eye protection when you clean metal. Some cleaning products can burn your skin or eyes.
If you want the best results, combine mechanical and electrochemical cleaning. This combo removes tough grime and leaves the surface ready for welding thin metal. Never skip this step, especially when working with thin gauges.
Now that your metal is spotless, it’s time to set up your welder. The right settings make a huge difference, especially when you’re welding thin stock. Too much heat can burn holes. Too little heat can leave a weak joint.
Here’s a quick guide to help you dial in your welder for thin sheet metal:
Use small-diameter wire: Try 0.024-, 0.030-, or 0.035-inch wire for thin materials.
Set the amperage and voltage low: For 0.024-inch wire, use 30-50 amps and 13-15 volts. For 0.030-inch wire, stick to 30-50 amps and 15-17 volts.
Adjust the wire feed speed: For 0.024-inch wire, set it between 130-160 inches per minute (ipm). For 0.030-inch wire, use 75-100 ipm.
Here’s a table to help you remember:
Material Thickness (inches) | Amperage (amps) | Wire Size (inches) | Voltage (volts) | Wire Feed Speed (ipm) |
|---|---|---|---|---|
0.125 | 125 | 0.035 | 15-17 | 200 |
0.125 | 125 | 0.030 | 13-15 | 250 |
0.125 | 125 | 0.024 | 13-15 | 437.5 |
Note: Always check your welder’s manual for the best settings. Every machine is a little different.
Don’t forget about gas flow. If you use too little shielding gas, your weld might get holes or turn out weak. Too much gas can make the weld bead too wide. For stainless steel, aim for a flow rate of 20 to 25 cubic feet per hour (CFH). Watch your welds as you go. If you see bubbles or rough spots, tweak the gas flow until things look smooth.
Before you jump into your real project, grab some scrap metal. Practice your welds on these pieces. Try filling holes, making straight beads, and joining thin pieces. This helps you get a feel for how the metal reacts to heat. You’ll also learn how to control the puddle and avoid burning through.
Pro Tip: Practicing on scrap lets you test different settings and techniques. You’ll build confidence and skill before you work on your main piece.
If you keep your metal clean, set up your welder right, and practice on scrap, you’ll master welding thin gauges in no time. These habits help you avoid common mistakes and get professional-looking results, just like we do at Foshan Dingyi Industrial Technology Co., Ltd. Good prep work sets you up for success in all your welding processes.
If you want to weld thin sheet metal without trouble, try the stitch welding technique. You make short welds, leaving gaps between each one. This lets the metal cool down and stops it from getting too hot. You avoid warping and burn-through because you control the heat better. Stitch welding works well for beginners. You can practice on scrap pieces and see how the metal reacts. You get a neat finish and strong joints, even if you use stick welding or other methods.
Tip: Space your stitches evenly. Let the metal cool between welds. This helps you keep the sheet flat and smooth.
Thin sheet metal bends and burns easily. You need to watch your heat and keep the metal steady. Here are some ways to prevent problems:
Make short welds to lower heat input.
Use a damp rag near the weld to cool the area.
Clamp the metal tightly so it does not move.
Try skip welding or tack welds to spread out the heat.
Pick the right amperage and electrode size for stick welding.
If you set your welder too high or use a large electrode, you might see burn-through. Burn-through makes holes and weakens the joint. It also looks messy and can cause rust later. Always match your welding method to the thickness of the sheet.
You might run into weld cracks, incomplete fusion, or distortion. These problems happen for many reasons. Poor ductility, high stress, and not enough preheating can cause cracks. If you see incomplete fusion, check for dirt or use a smaller electrode. Incomplete penetration means your joint is not lined up or you move too fast. Distortion comes from uneven heat or welding in the wrong order. Burn-through often happens with high welder settings or slow torch movement, especially with stick welding on thin metal.
Note: If you see defects, stop and check your setup. Clean your metal, adjust your settings, and clamp everything tight. We always follow strict standards at Foshan Dingyi Industrial Technology Co., Ltd. to make sure every weld meets quality requirements.
You might feel unsure at first, but every weld you make helps you improve. Practice often and don’t let early mistakes stop you. Safety, patience, and good technique matter most when you work with sheet metal. If you want to keep learning, try these next steps:
Prepare your metal and set up your machine.
Secure your sheet metal and load your MIG gun.
Start welding with short stitches and inspect your work.
You can ask a mentor for feedback or join a welding group. Explore advanced methods like TIG welding, stitch welding, or spot welding. If you want formal training, check out these popular classes:
Course Name | Level | Description | |
|---|---|---|---|
GMAW (MIG) Sheet Metal | Level 1 | Beginner workshop for new welders | |
GMAW (MIG) Sheet Metal | Level 2 | Intermediate workshop for those with some experience | |
GMAW (MIG) Sheet Metal | Level 3 | Advanced workshop, prepares for certification |
Welding sheet metal opens doors in many industries. You can earn a good salary, use your creativity, and see the results of your work. Sheet metal is everywhere—from appliances and cars to buildings and medical devices. When you master welding, you build strong, lightweight, and flexible structures. That’s a skill you’ll use for life.
You’ll get the best results with MIG or TIG welding. MIG works fast and is easy to learn. TIG gives you clean, precise welds. Both methods help you avoid burn-through and warping.
Try stitch welding or tack welds. Clamp your metal tightly. Let the metal cool between welds. Use lower heat settings. These steps keep your sheet metal flat and strong.
You need a welding mask, heat-resistant gloves, long sleeves, and ear protection. Always keep a fire extinguisher nearby. Make sure your workspace has good airflow.
No, you should always clean the metal first. Use a wire brush or grinder to remove rust and paint. Clean metal helps you get strong, smooth welds.
Grab some scrap sheet metal. Test different settings and techniques. Try filling holes and making straight beads. Practicing helps you build skill and confidence.


